A home-gym mirror is one of the highest-impact upgrades you can make to a basement, garage or spare-room workout space. It doubles the visual size of the room, gives you instant feedback on lifting form, and turns a cramped corner into something that genuinely looks like a place you want to train. Done right, the mirror is invisible — clean edges, no waves, no warping, no telltale seam between panels. Done wrong, it shimmies, distorts your reflection, or worse, comes off the wall.
This guide walks through every decision that goes into a full-wall home-gym mirror in North Jersey — sizing, thickness, safety film, mounting methods, wall prep, lead time and cost. If you're looking at the broader category of custom mirror walls (not just gyms), start with our complete guide to custom mirror walls in NJ and come back here for the gym-specific specs.
How big should a home-gym mirror be?
The rule we use on every measure visit: at least 6 feet tall, full usable wall width, bottom edge 24 to 30 inches off the floor. Those three numbers cover almost every situation.
Height. 6 feet of mirror height is the practical minimum because it captures most of a standing adult plus enough above-head clearance to see overhead presses, jerks and squats with a bar locked out. 7 feet is the comfortable spec for any ceiling above 8 feet, and 8 feet is the right call in a basement with 9-foot ceilings or a garage with the ceiling pushed up against the trusses. Below 6 feet you will routinely lose sight of your own form on lifts that take the bar over your head — frustrating for any serious training.
Width. Full usable wall width. If your workout area is 10 feet wide, the mirror should be roughly 10 feet wide. The visual effect of a continuous mirror wall is dramatic — it doubles the room and makes a small gym feel substantial — and any gap at the side of the mirror breaks the illusion. We trim around outlets, light switches and HVAC registers but cover the rest of the wall edge-to-edge.
Bottom-edge height. 24 to 30 inches off the finished floor. The mirror should clear the baseboard with about 1/4 inch of breathing room, then sit on a J-channel that becomes the bottom finish line. Higher than 30 inches and you start losing sight of your feet during squats and deadlifts; lower than 24 inches and the mirror is vulnerable to dropped plates and dumbbells. 28 inches is the sweet spot for most adults and works well with standard barbell heights racked on the floor.
Above-head clearance matters more than most homeowners realize. If you press a barbell overhead and the top edge of the mirror cuts off the bar at lockout, the mirror is too short. Measure the height of your tallest training movement — kettlebell snatch, push press, overhead squat with arms locked — and add 6 inches of clearance above that.
What thickness of mirror should I use?
For any wall-mounted gym mirror, 1/4-inch (6mm) plate is the standard. It is the same spec used in dance studios, commercial gyms, yoga studios and ballet schools. 1/4 inch has the structural rigidity to lay flat against a wall without flexing into visible waves, it carries safety film cleanly, and it cuts and edges to a clean polished finish.
Thinner mirror — 3/16 inch (5mm) or even 1/8 inch — is occasionally requested for small accent panels, but we don't spec it for any gym install above 4 feet wide. Thinner glass flexes on the wall, especially in the middle of a long unsupported span, and the resulting waves distort your reflection enough to make form checks unreliable. The cost savings are minimal once you account for the safety film, the install labor, and the risk of a complaint about visible warping.
Thicker mirror — 3/8 inch (10mm) — shows up in two situations: commercial-grade installs where local code demands it, and freestanding leaning mirrors where the glass is propped against the wall without adhesive. For a wall-mounted home gym, 3/8 inch is overkill — the extra weight makes the install more difficult and the visual difference is invisible from across the room.
| Thickness | Use case | Notes |
|---|---|---|
| 3/16″ (5mm) | Small accent panels under 4′ wide | Not recommended for gyms — flexes and distorts |
| 1/4″ (6mm) | Full-wall home and commercial gym mirrors | The standard — flat, durable, safety-film compatible |
| 3/8″ (10mm) | Leaning mirrors, commercial-code installs | Overkill for residential wall-mount; harder to install |
Safety film & anti-shatter backing
Safety-backed mirror is the single most important upgrade on any home-gym install, and we recommend it on every job. The product is a thin polyester or vinyl film bonded to the back of the mirror at the factory. If the mirror ever fractures from impact — a dropped 45-pound plate, a slip with a kettlebell, a stray dumbbell — the film holds the broken pieces in place against the wall. Nothing falls. Nothing flies. You replace the panel at your leisure rather than dealing with shards across the floor of a room where you're often barefoot or in socks.
The film adds roughly $2 to $4 per square foot to the cost of the mirror. For a typical 10-by-7 home-gym wall (70 square feet) that is roughly $140 to $280 extra — a small premium for the most meaningful safety improvement we know of in a room with heavy objects moving fast. Commercial gym installs almost always require it by code; we extend the same standard to residential because gyms are by definition impact environments.
Two product variants are common. Standard safety film is rated for general impact protection and is the right spec for almost every home gym. High-strength security film is a thicker, more durable laminate used in commercial fitness centers and high-traffic studios. The difference is incremental for residential use; standard film is the right call unless your gym sees multiple users daily.
Tip: If you are storing dumbbells or kettlebells against the mirror wall, install a low rubber bumper rail (a 4-inch tall plywood-and-rubber kickplate) along the floor in front of the mirror. The rail catches any sideways roll and prevents direct contact with the bottom edge of the glass. We can install the rail as part of the mirror job.
How is a gym mirror mounted to the wall?
Three standard mounting methods. We use a combination of two on most home-gym installs for redundancy.
Mirror mastic
A high-strength construction adhesive specifically formulated for mirror backing. The mastic is applied in vertical beads to the back of the mirror, the panel is pressed onto the wall, and the adhesive cures over 24 to 48 hours into a permanent bond. Mastic is the fastest, cleanest install method and produces an invisible finish — no clips, no channels, no visible hardware. It is also permanent: removing a mastic-installed mirror later requires cutting it free and patching the drywall behind it.
Mastic is only as good as the wall behind it. The drywall must be clean, dry, sealed and structurally sound. Fresh paint needs at least 30 days of cure time before mastic contact. Textured walls (orange peel, knockdown, swirl) have to be skim-coated or sealed because the mastic cannot bond reliably to an uneven surface. Wallpaper has to come off entirely.
J-channel and top clips
A mechanical capture system. A J-shaped aluminum channel is installed along the bottom of the mirror wall — the mirror slides into the channel and rests on its bottom edge. Top clips (small metal brackets) hold the top of the mirror against the wall and prevent it from tipping forward. J-channel and clips are required by some commercial codes and are a good belt-and-suspenders choice on any residential gym install where the wall prep is less than ideal.
On most of our home-gym jobs we install both — mastic for the primary bond and a J-channel along the bottom as a mechanical backup. If the adhesive ever fails (rare, but possible on a poorly prepped wall), the J-channel catches the mirror and gives us time to refasten without any damage. The channel is finished in a matte aluminum or brushed nickel and reads as a deliberate trim detail rather than a visible mounting clip.
Z-clips and rosette clips
An older mechanical system using individual clips at each corner. Still used on small accent mirrors but uncommon on full-wall installs because the clips are visible from the front, the mirror can rattle slightly against the clips, and the corner load is concentrated rather than distributed. We rarely spec rosette clips on a gym install.
Wall prep — what we look for during the measure visit
Before any mirror goes up, the wall needs to be ready. The measure visit is where we identify what prep is required and quote it as part of the job (or hand it off to your contractor if structural changes are needed).
Drywall integrity. The drywall behind the mirror needs to be continuous, clean and solidly fastened to the studs. Any popped nails, cracks or soft spots have to be repaired before the install. For very large mirror walls (above 60 square feet single-piece equivalent), we often recommend adding a 3/4-inch plywood backer behind the drywall to give the adhesive a more substantial substrate.
Surface finish. Smooth painted drywall is the best surface for mastic. Textured walls need a skim coat. Wallpaper has to come off. Fresh paint needs 30 days of cure time. Primer is fine — in fact a clean primer coat is often the ideal surface for mastic.
Level and plumb. The wall needs to be reasonably plumb and the floor reasonably level. Small variations (1/4 inch over 8 feet) we can compensate for with the J-channel shim. Large variations (more than 1/2 inch) cause visible distortion in the reflection and need to be corrected before install.
Electrical and HVAC. Outlets, switches and HVAC registers behind the mirror have to be relocated, covered or trimmed around. We can trim around any of them at the mirror, but relocating an outlet is usually the cleaner finish. Plan ahead — moving electrical takes a separate trade visit.
For projects that involve more than a simple flat-wall mirror — wraparound corners, returns, ceiling-mounted panels — we walk the whole layout during the measure and discuss seam strategy before any glass is cut.
Seams: when you need them, what they look like
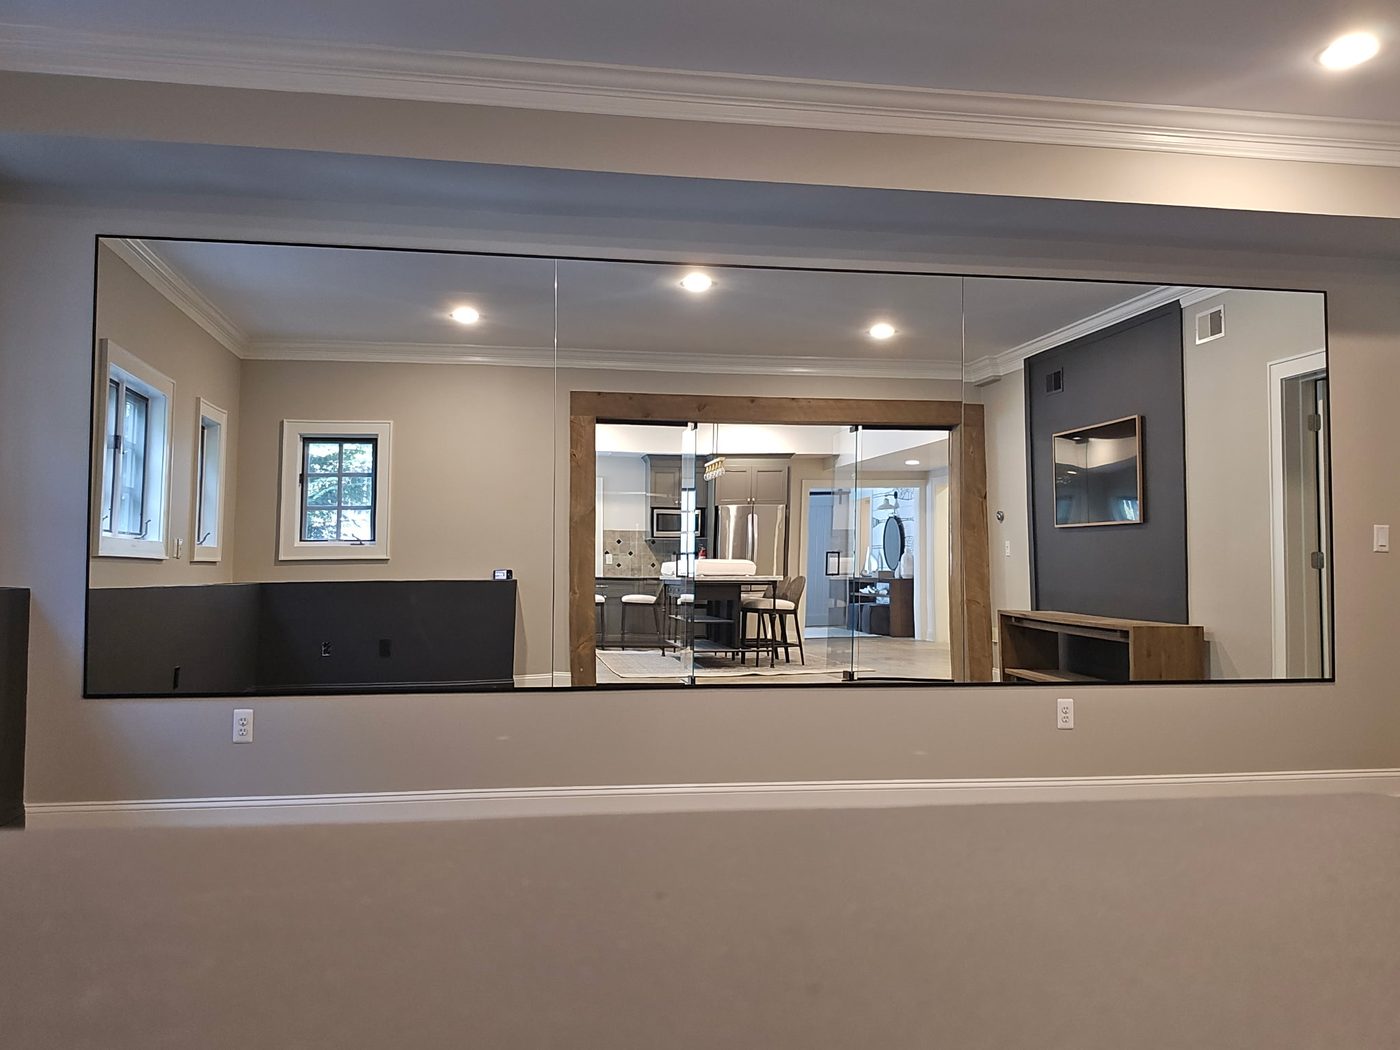
The practical maximum for a single piece of mirror is roughly 72 inches by 130 inches. Most home-gym walls exceed that, so the install is typically two or three panels with hairline seams.
A hairline seam is a 1/16-inch gap between two polished mirror edges, butted together flush against the wall. From a standing position 6 feet back, the seam is visible only as a thin vertical line — most homeowners stop noticing it within a few days of the install. We polish every interior edge that will be visible at a seam and lay the seams out so they fall at logical spots in the room (centered, or aligned with a structural feature).
Seam placement is part of the design conversation. A wall that is 14 feet wide will typically run as two 7-foot panels (one centered seam) or three 4-foot-8-inch panels (two seams positioned by eye). The choice depends on what looks best in your room and what fits cleanest through the doorway during delivery.
How much does a custom gym mirror cost in NJ?
Most North Jersey home-gym mirror installs fall between $850 and $3,200 installed, including the mirror, safety film, mounting hardware and labor. The five biggest cost drivers:
| Factor | Impact on price |
|---|---|
| Total square footage | The single biggest driver — material and labor scale with size |
| Panel count | Two-panel and three-panel walls add fabrication and install time |
| Safety film | +$2–$4 per sq ft — we recommend on every gym install |
| Edge finish | Polished pencil edges on visible seams; flat edges hidden in J-channel |
| Wall prep | Skim coat, plywood backer or drywall repair quoted separately |
| Delivery & install crew | Two-person carry for any panel above 6 feet; route within Bergen/Passaic standard |
Typical ballparks for the most-requested sizes:
- 8′ × 6′ single-panel gym mirror, safety film, mastic + J-channel: $1,100 – $1,600 installed
- 10′ × 7′ two-panel gym mirror, safety film, hairline seam: $1,650 – $2,300 installed
- 12′ × 7′ two-panel gym mirror, safety film, hairline seam: $2,000 – $2,800 installed
- 16′ × 7′ three-panel gym mirror, safety film, two hairline seams: $2,800 – $4,200 installed
- Wraparound corner gym mirror (two walls, mitered or seamed return): add 25–40% over a single flat wall
For our active service offering on custom mirrors, see our mirrors page. For broader context on mirror-wall design across the home, the custom mirror walls complete guide covers dining rooms, foyers, living rooms and powder rooms.
Planning a home-gym mirror?
We measure on-site, identify any wall prep needs, and quote in writing — most jobs are templated and installed within 10 to 14 business days. Delivery and install across Bergen, Passaic, Hudson and Essex counties.
Get a Free In-Home MeasureLead time and what install day looks like
Most home-gym mirror jobs are templated and installed within 10 to 14 business days. The breakdown:
- Day 0 — measure visit. 30 to 45 minutes on-site. We measure the wall, check the prep, lay out seam locations, talk through edge finish and safety film, and write the order on the truck.
- Days 1–7 — fabrication. Cut the panels to size, polish the visible edges, apply the safety film at the factory.
- Days 8–10 — install scheduling. We schedule a two-person install on a route day that matches your address.
- Install day. 3 to 5 hours on-site for a typical two-panel install. We install the J-channel first, dry-fit the panels, apply mastic to the back, set the panels, and finish with top clips. The mastic cures over 24 to 48 hours; the mirror is fully usable the next day.
Wall prep work (drywall repair, plywood backer, electrical relocation) is often handled in the days before the install. If we identify a prep requirement at the measure visit, we'll quote it separately and either handle it ourselves or hand it off to your contractor depending on the scope.
Care and cleaning
Gym mirrors are low-maintenance but they do show fingerprints, sweat residue and chalk dust faster than a mirror in a quieter room. A weekly wipe with an ammonia-free glass cleaner and a microfiber cloth handles 90% of the maintenance. Spray the cloth (not the mirror) to avoid overspray running down into the J-channel and pooling at the bottom edge.
The two things to avoid: ammonia-based cleaners (long-term exposure can damage the silver backing at the edges where it is exposed) and abrasive scrubbers (steel wool, scouring pads, anything with grit). For chalk dust, a slightly damp microfiber removes it cleanly without scratching the surface.
If you ever notice dark spots forming at the edges of the mirror — small black or grayish patches — that is edge corrosion of the silver backing, usually from moisture wicking in from the bottom edge. It is uncommon in a properly installed gym mirror but does occasionally show up in basement gyms with high humidity. The fix is to replace the affected panel and improve ventilation in the room. A dehumidifier in the gym is a good preventive measure if your basement runs damp.
Putting it all together
A home-gym mirror is a relatively simple project on paper — a piece of glass on a wall — but the details that separate a clean install from a messy one all happen before the mirror arrives. Get the size right (at least 6 feet tall, full usable width). Spec 1/4 inch with safety film. Prep the wall properly. Use a J-channel for mechanical redundancy. Plan the seams so they fall in logical places. Account for above-head clearance on overhead lifts.
Done right, the mirror disappears as a design feature and becomes a tool. You stop noticing it as a piece of glass and start using it for what it's for: instant feedback on your form, a brighter and visually larger workout space, and a finished room that looks like a place you want to spend time. For most North Jersey homes the entire project is a 10-to-14-day timeline with one measure visit and one install day — call to schedule the measure and we'll quote it in writing the same week.